How to Turn a Photo into Cartoon with GIMP
There are two ways in which you can turn a photo in cartoon using Gimp. For this tutorial, we will be working on a free stock photo which can be downloaded from the following link:
http://www.freeimages.com/photo/1393948
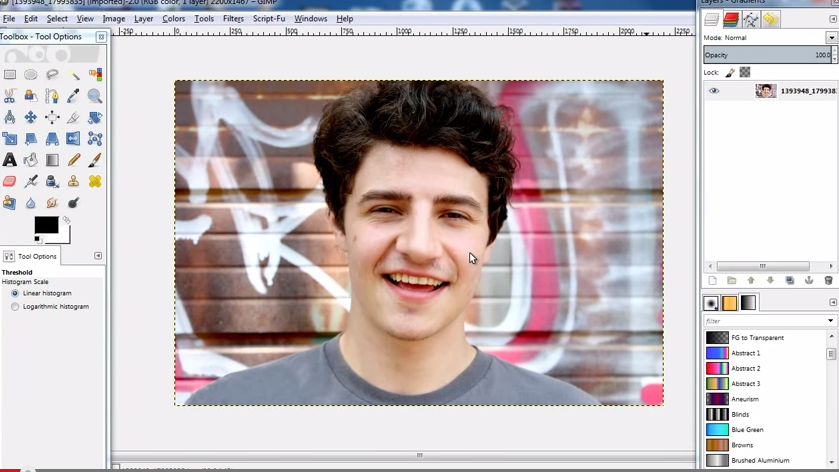
Download the image, open it up in GIMP and let’s get started.
Step 1: Applying the Cartoon Effect
First, let’s experiment with the built-in Cartoon effect filter in Gimp. For that, simply move to the Filter menu on top, hover over the Artistic option and once the new menu opens up, click on the cartoon option.
With the new window opened up, you will see two parameters. The mask radius option and the percent black option. The mask radius feature determines the area where the filter will be applied. Moving towards the maximum value, thick black lines will appear, decreasing the detailing in the image. Since that is what we want for the cartoon effect, let’s keep the maximum value for this parameter.
The percent black option will determine the amount of black color that would be applied on the canvas. Increase the value to get thicker and darker black lines. We have kept the value to 0.233 for this tutorial. Once done, hit enter and you will see the effect applied on the image.
Step 2: Duplicating the background layer
Another way to add a cartoon effect is using the threshold filter. So let’s bring back the image in its original form. You can undo the effect pressing CTRL Z. After that, move towards the layer panel, right click on the original layer and select the “Duplicate Layer” option.
Step 3 : Applying the Threshold effect
Now move to the “Options” menu on top and click on the Threshold option. With the new window opened up, you will notice a visual graph representation of the selected layer. You can set the threshold adjusting the range and intensity using the sliders in the window. Decrease the blacks moving the slider towards the left side. If you want the exact values, we have set 119 for the black slider and the default value for the white slider.
Once done, click on the ok button and you will see the image turned into a black and white image.
Step 4: Changing the blending option
After that, move to the Layers panel, make sure the black and white layer is selected and after that, open up the Mode menu. Over here change the mode of the layer to “Overlay” so that it blends in with the original background image.
With that done, you will notice deeper blacks and less detailing in the image. And that’s how you can turn a photo into cartoon using Gimp.
[ica_orginalurl]